Start the NAS with only a 250GB SSD
Wipe the 1TB SSD completely and put it in the NAS as well
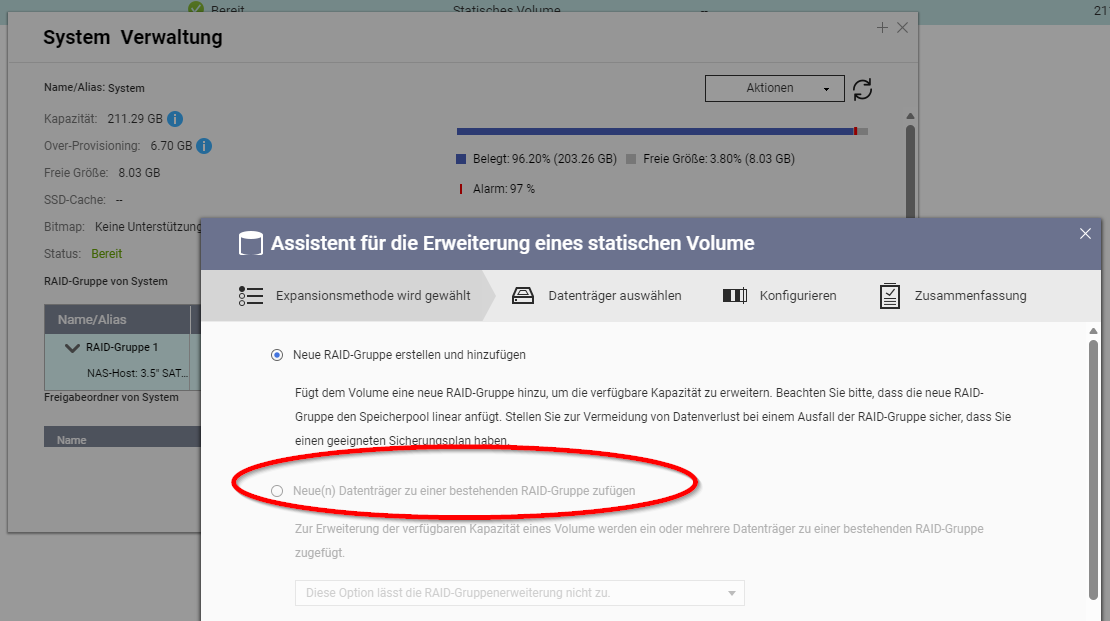
Set up RAID 1 with just the single 250GB SSD
Replace the 250GB SSD with a second 1TB SSD
Expand the RAID
^^^^^^^^
Then, optionally, split the RAID 1 back into single drives (there used to be a guide for this on the old forum, but unfortunately it’s no longer available) and happily send the other 1TB SSD back to Amazon.
hmm, I think this is all just too much hassle for me, so I’ll probably wipe the 1 TB drive and set it up as a single drive again—let the media console start from scratch…
unless SteveKo and the internal team come up with a new idea by Monday.
@qPlayer Our Multimedia Console team took a closer look: unfortunately, the usual backup tools don’t include the thumbnails and face data. The only way is to manually move the hidden system folders via SSH. Since doing this on the command line is pretty risky and things can go wrong quickly, we recommend the following: Let our support team handle it for you remotely.
We’d do this in two short sessions:
Remote Session 1 (before the upgrade): We’ll securely back up your MMC data (including thumbnails) to your HDD RAID. After that, you can calmly wipe your SSD and rebuild the volume.
Remote Session 2 (after the upgrade): Once your new SSD setup is ready, we’ll move everything back to the right place.
The result: your media library is immediately available again, without the annoying rescanning.
Du könntest deine Multimedia-Konsolendatenbank auf Ihr RAID 5 exportieren, den SSD-Cache deaktivieren, den Abschluss der Synchronisierung abwarten, den Cache löschen und neu erstellen. Anschließend importiere das vorherige Backup in die Multimedia-Konsole. Ich gehe davon aus, dass QTS auf diese Weise alle Partitionen neu erstellt. Wenn du die Datenbank nicht als Cache, sondern als Pool verwendest, ist das Vorgehen identisch. Migriere die Inhalte in einen anderen Pool, löschen den Pool und erstelle ihn neu. Und wie immer gilt: Sicherung der Daten, bevor rgendetwas unternehmen wird.
md321 ist die Swap Partition.
=========
You could export your Multimedia Console db to your raid5, turn off the ssd cache, wait for the syncing to end, remove the cache and create it. Then import your previous export in Multimedia Console. I believe that doing it this way QTS will recreate all the partitions. If you are not using it as a cache but rather as a pool, same thing. Migrate the contents to a different pool, delete the pool and recreate it. And as always, backup, backup and backup before you do anything.
@qPlayer Thank you very much for your flexibility. Unfortunately, I neither have the permission nor the necessary tools to connect directly to your NAS.
Unless you are willing, as a system integrator, to provide credentials for a third-party tool like TeamViewer, the official and safest approach is to submit a support ticket through the QNAP customer service portal.
Once you have opened a ticket, the official QNAP support team can arrange a secure remote maintenance session with you via the Helpdesk application integrated in QTS. This ensures a safe and proper process.