Starting with QuTS hero h5.3.0, QNAP NAS now offers beta support for a two-node “Active-Standby” high availability (HA) solution.
I immediately set up an HA configuration and ran some tests!
Requirements for Setting Up HA
To build an HA setup, you’ll need two NAS devices with equivalent hardware configurations. Specifically:
- Both must have the same CPU (devices from the same series should be fine)
- Both must have the same RAM capacity
- Both must have the same number and capacity of HDDs/SSDs
- Both must have the same number and speed of Ethernet ports
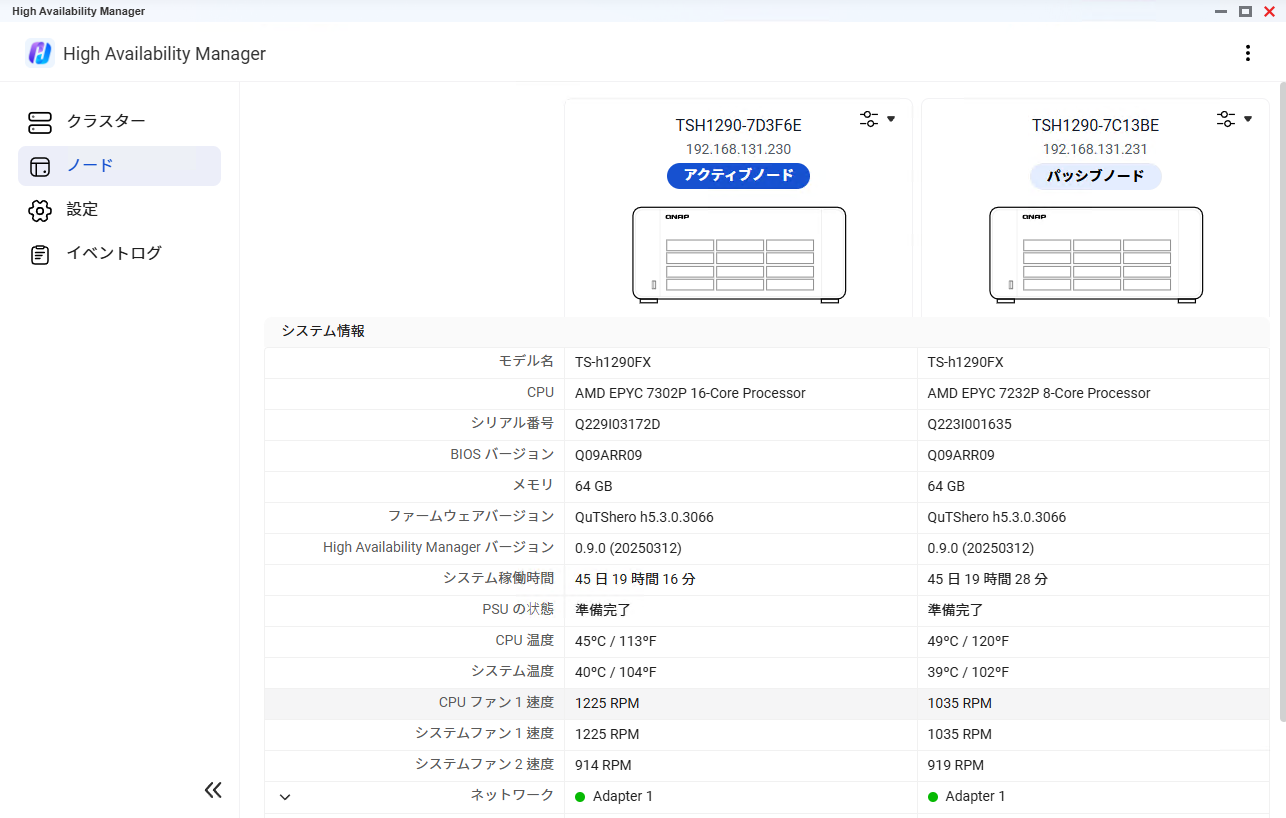
For this test, I used two TS-h1290FX units (specifically, TS-h1290FX-7232P-64G and TS-h1290FX-7302P-128G).
Note: With the TS-h1290FX-7302P-128G, I couldn’t start the HA setup due to the difference in memory capacity. After removing 64GB to match both units at 64GB, I was able to proceed with the HA configuration.
As of 2025/5/15, firmware for TS-h1290FX can be downloaded as a Public Beta here — specifically, “h5.3.0.3115 build 20250430.” Below, I’ll walk through the steps starting from having 5.3.0 already applied.
Here’s how my setup looks:
Setting Up the HA Configuration
Launching and Setting Up High Availability Manager
Once the HA Manager installation is complete, a “High Availability Manager” icon will appear. Click the icon to launch and begin setup.

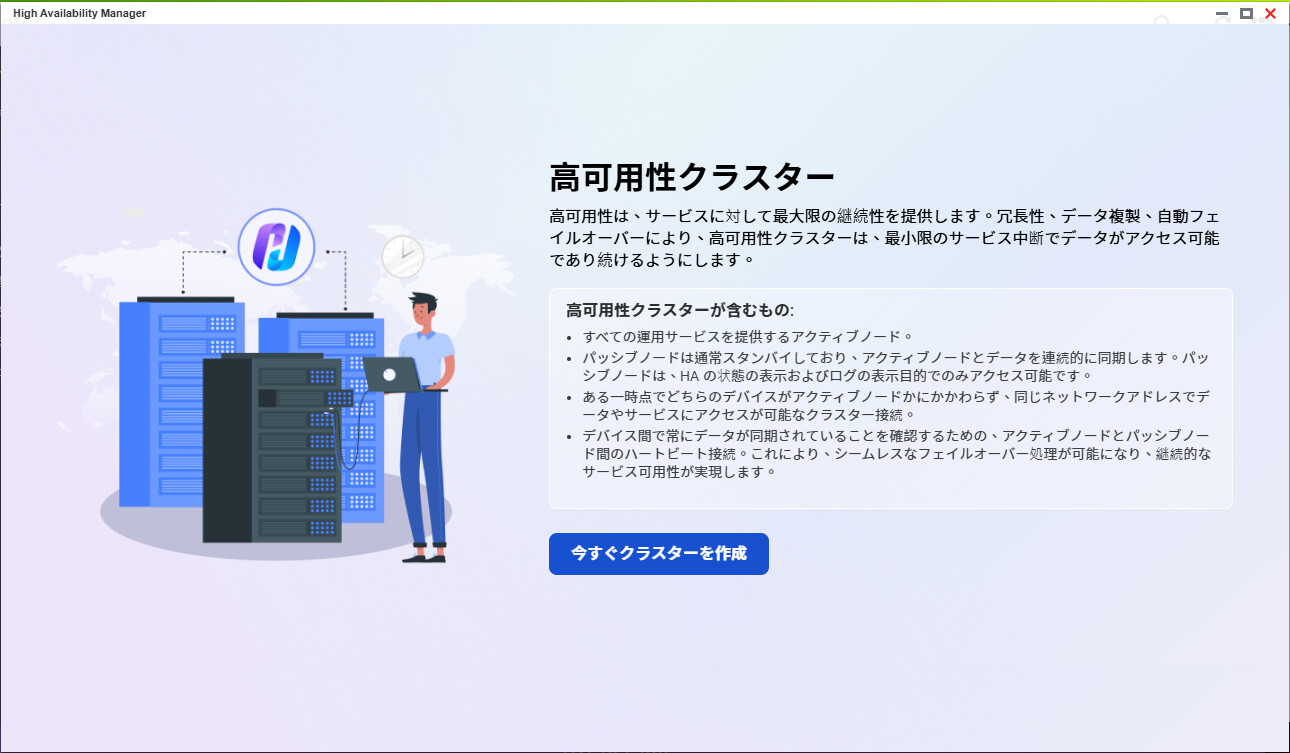
When you launch High Availability Manager, you’ll see a settings screen like this:
The following notes are listed:
High Availability Cluster
High availability provides maximum continuity for services. Through redundancy, data replication, and automatic failover, a high availability cluster ensures data remains accessible with minimal service interruption.
What’s included in a high availability cluster:
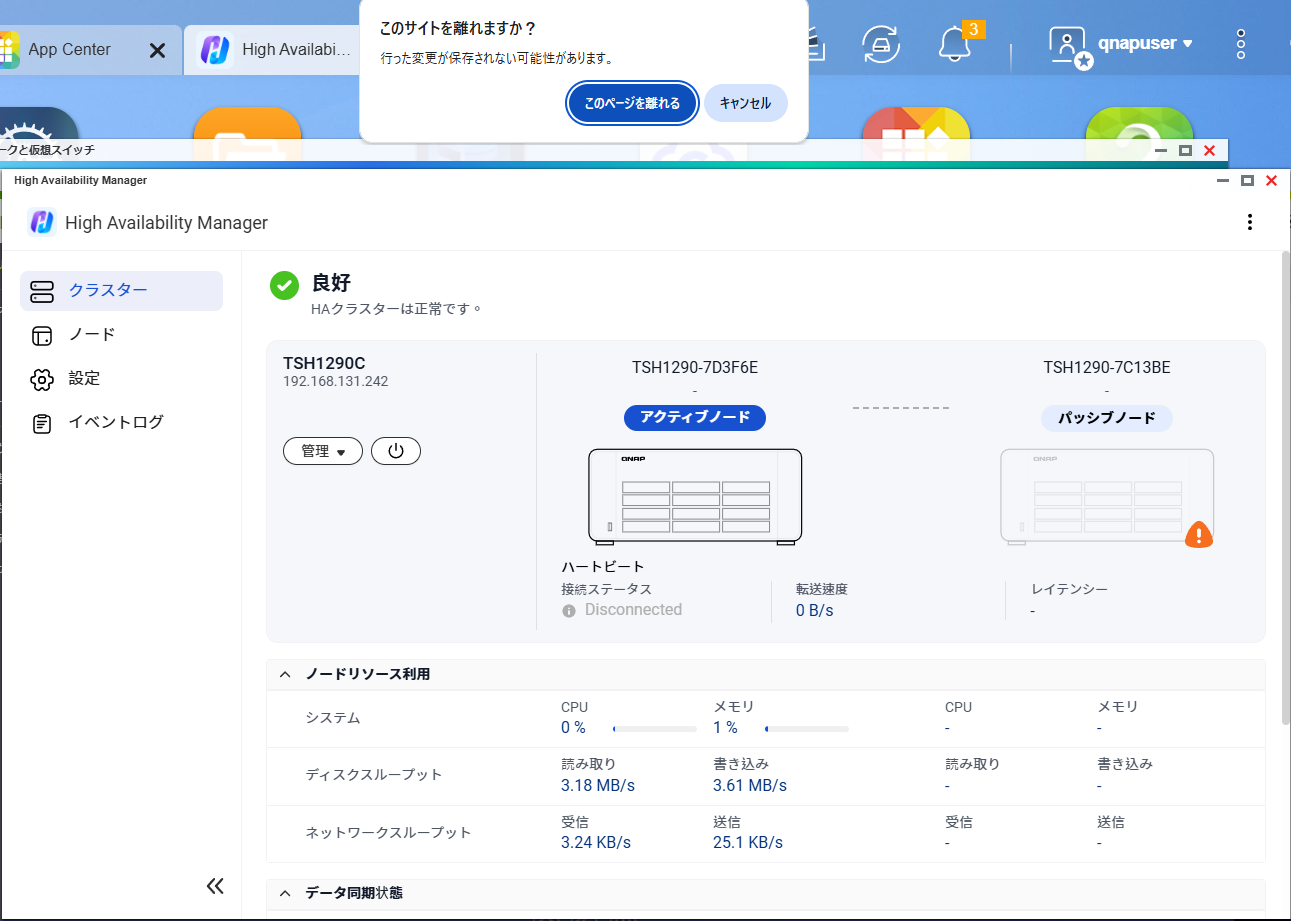
- An active node providing all operational services.
- A passive node that usually remains on standby, continuously syncing data with the active node. The passive node is accessible only for viewing HA status and logs.
- Regardless of which device is the active node at any given time, cluster connections allow access to data and services using the same network address.
- A heartbeat connection between active and passive nodes to ensure constant data synchronization. This enables seamless failover and continuous service availability.
Next, the requirements for setting up HA are displayed.
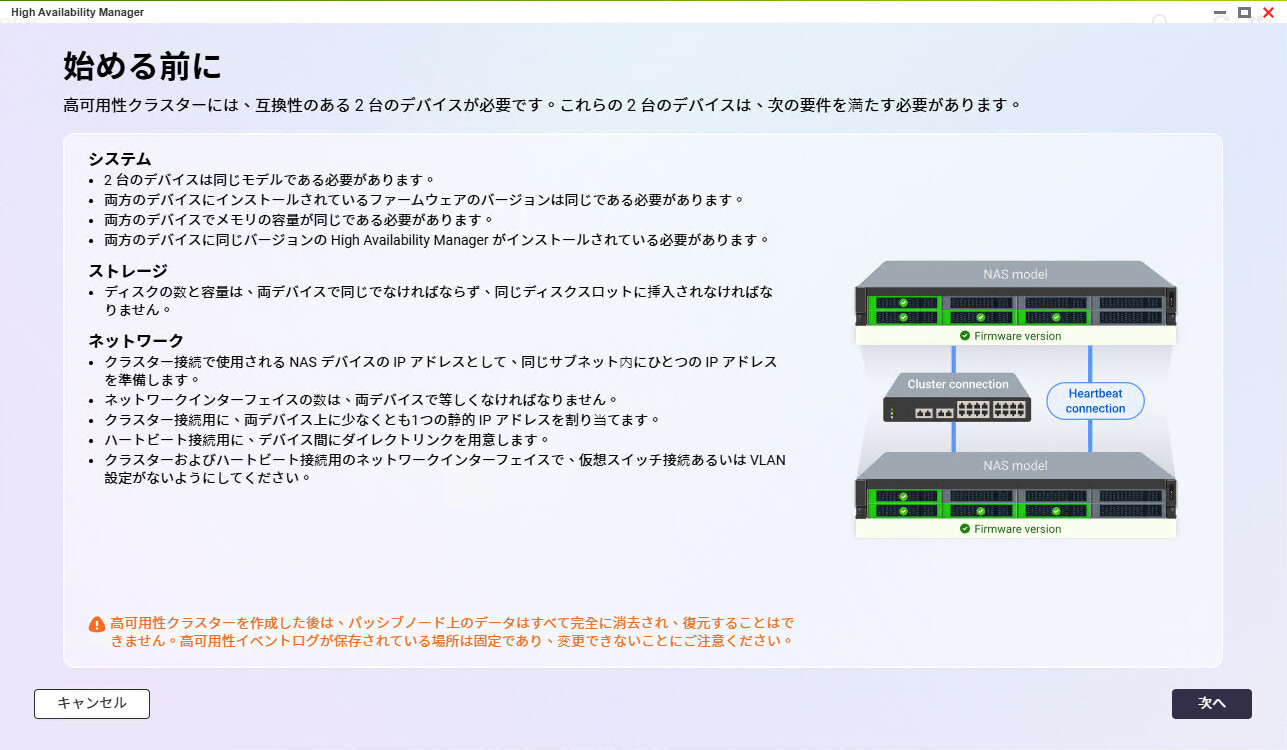
In summary:
- Both devices must be the same model, with identical firmware and hardware configurations, including HDD/SSD slot assignments and memory capacity.
Check the notes and click “Next.”
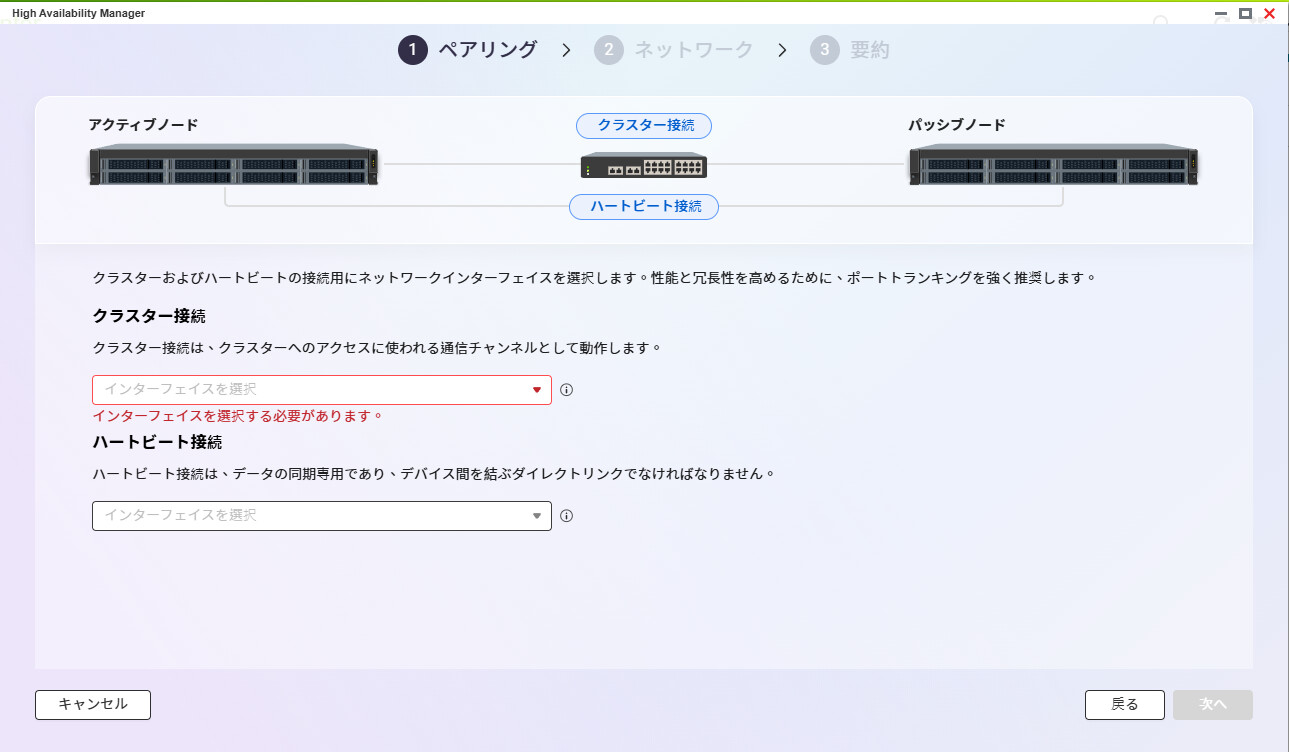
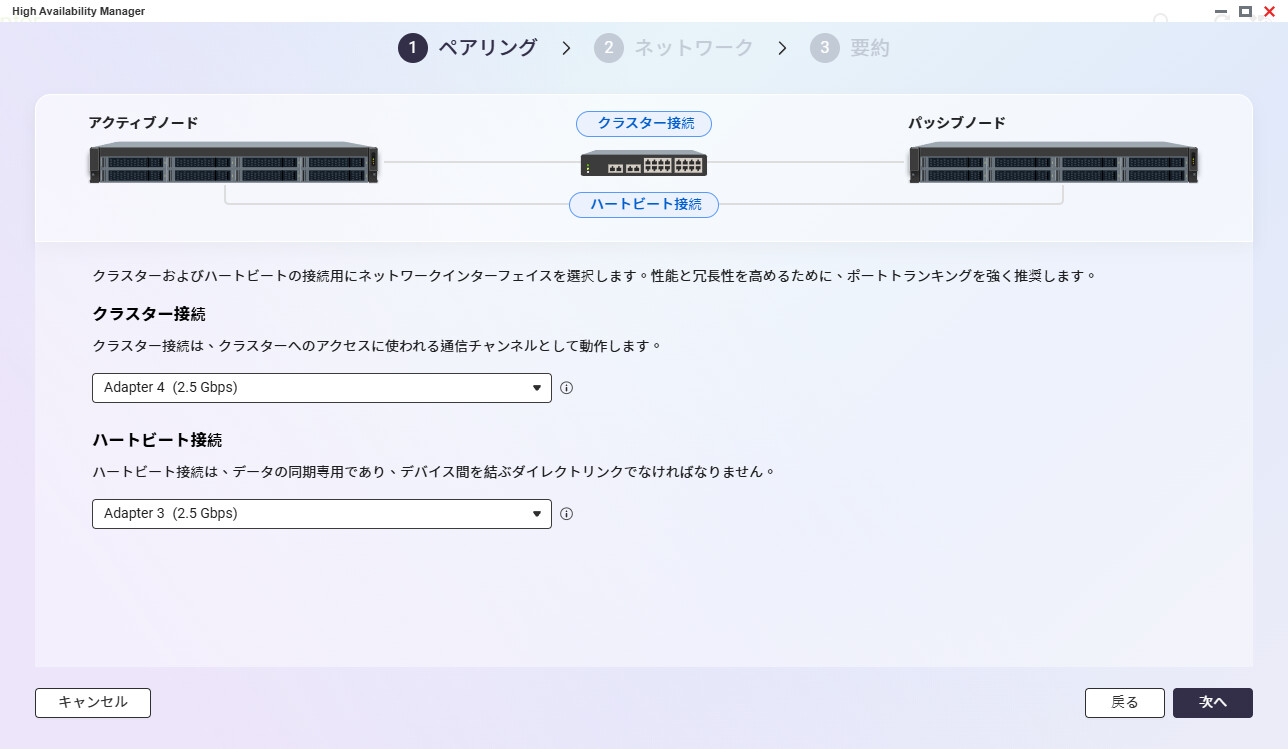
You’ll need interfaces for cluster connections and heartbeat connections between nodes, so I used one of the two available 2.5GbE ports for the heartbeat connection.
I set the IP addresses to fixed values: “192.168.252.100” and “192.168.252.200.”
Since “heartbeat” comes up here, let me briefly explain. Heartbeat literally means “heart’s pulse.” In cluster systems, where one node takes over if the other fails, it’s necessary to check whether services are running properly. This exchange is called “heartbeat.” The heartbeat connection checks the other node’s status, and if it’s down, the standby node takes over service provision.
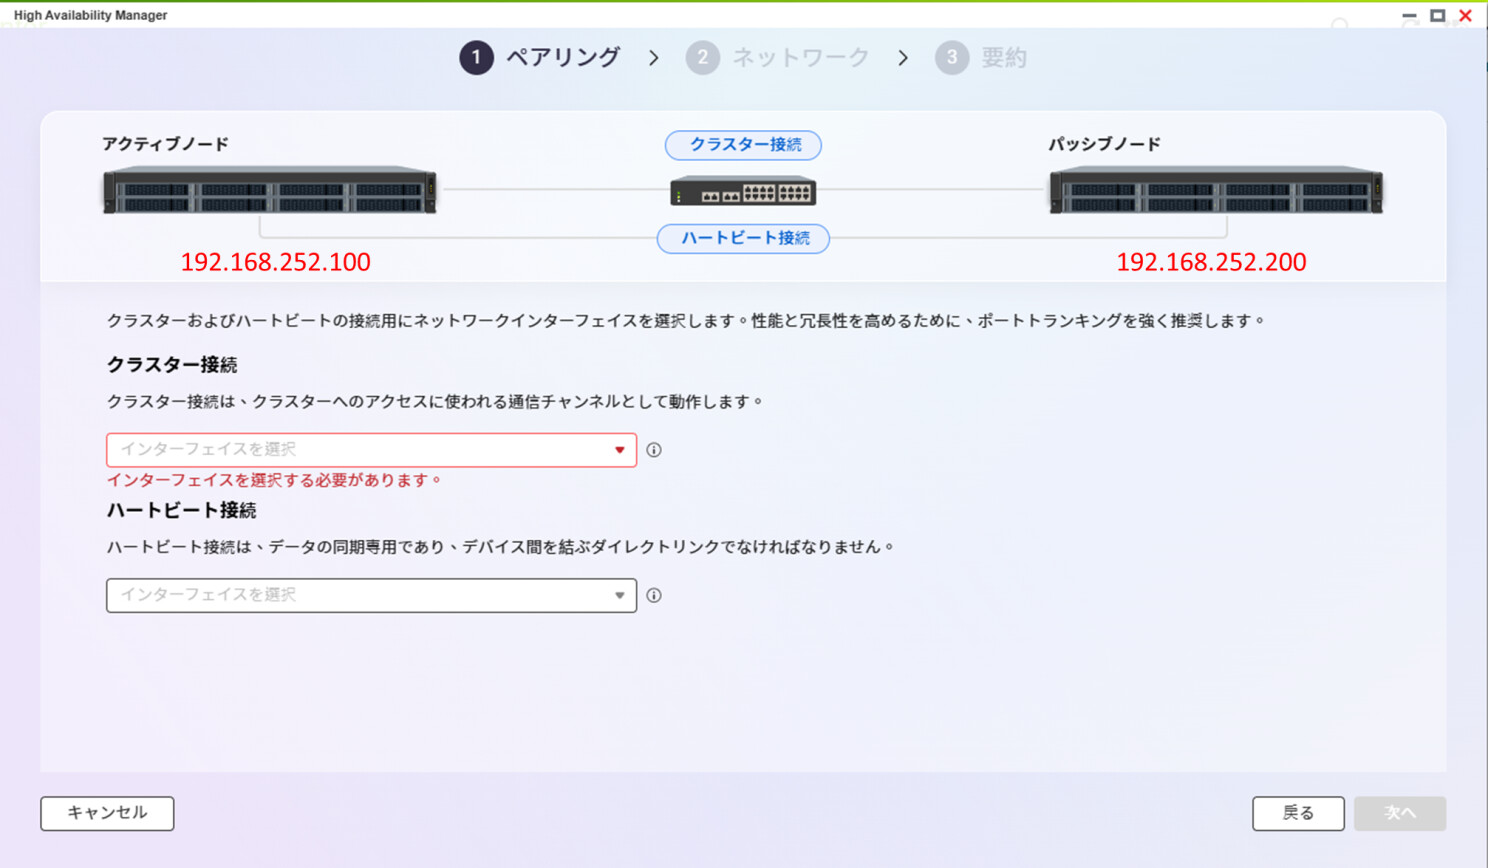
Select the interface and click “Next.”
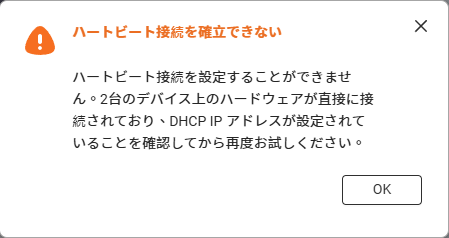
If the heartbeat connection’s IP address is set to static, it won’t meet the requirements; it needs to be set to DHCP (since there’s no DHCP server, it’s effectively Auto IP).
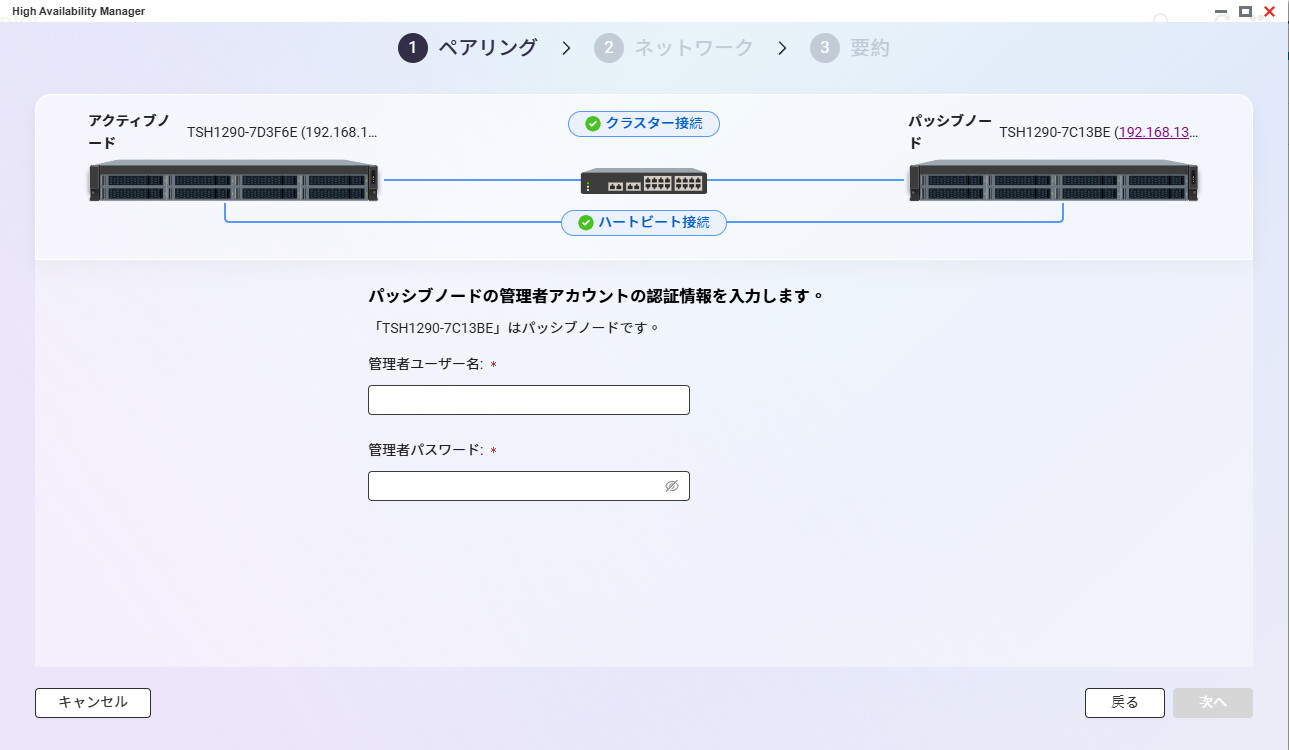
Once the heartbeat connection is confirmed, enter the administrator username and password for the passive node.
Next, the system retrieves information from the passive node to check whether the cluster requirements are met.
If “HA Manager” isn’t installed on the passive node at this point, you’ll be prompted to install it. It’s best to install “HA Manager” on the passive node beforehand.
If the two NAS units have different memory capacities or configurations, you’ll be warned at the next step and won’t be able to proceed. Make sure to match the hardware configurations in advance.
Also, the cluster connection side must be set to a static IP.
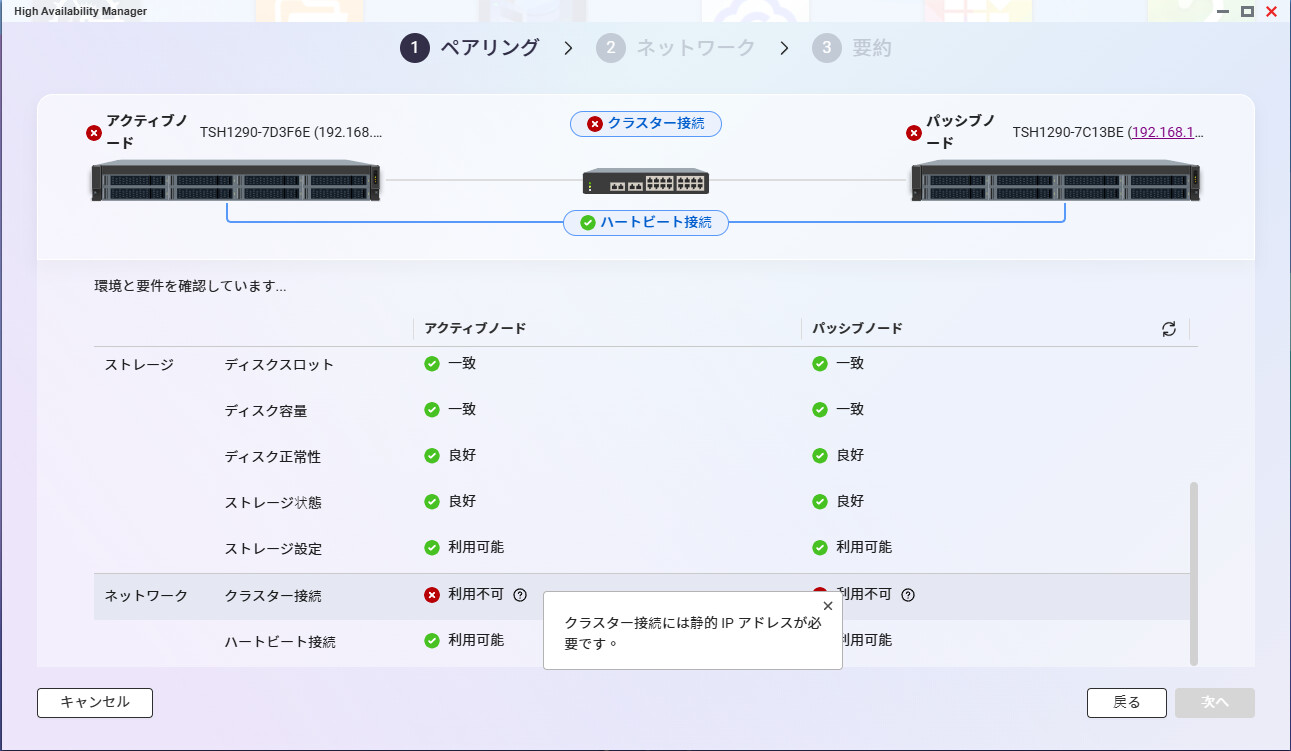
So, set the static IP in line with the DHCP server side.
Once the static IP is set, everything is OK.
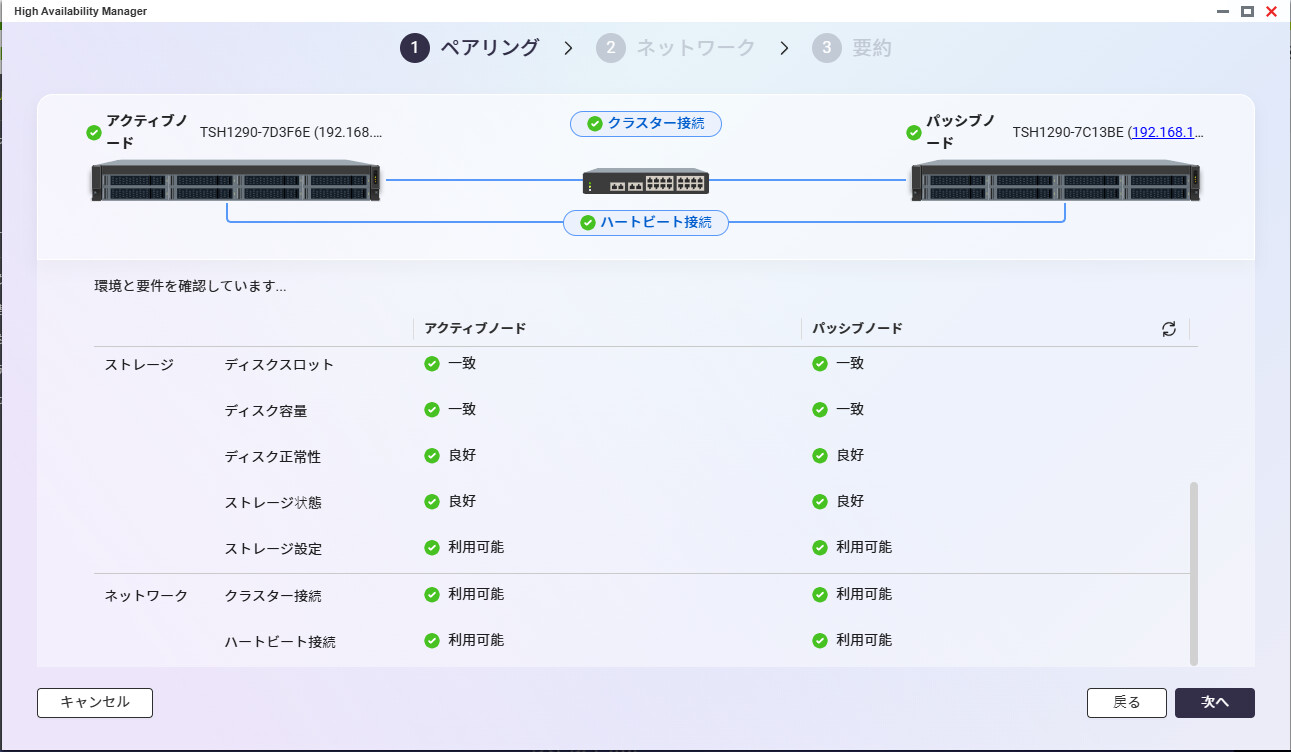
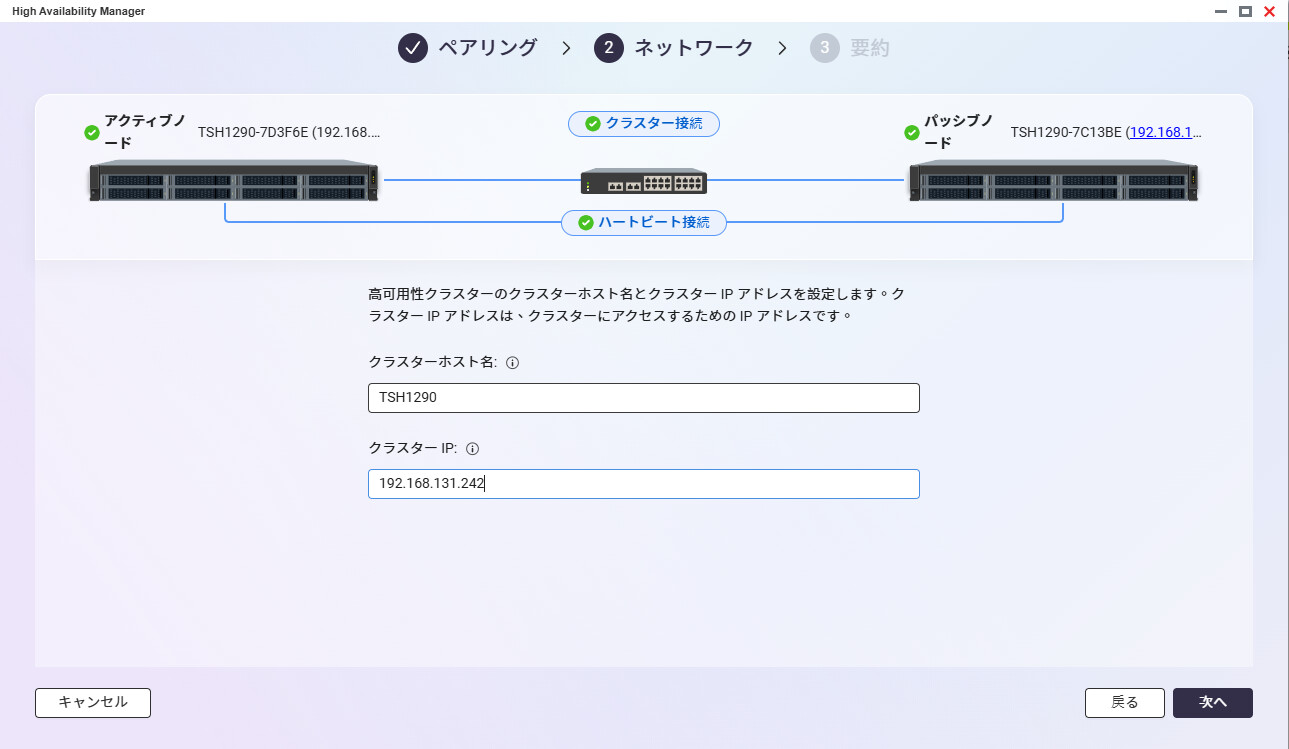
Click “Next” to proceed to setting the cluster’s host name and IP address.
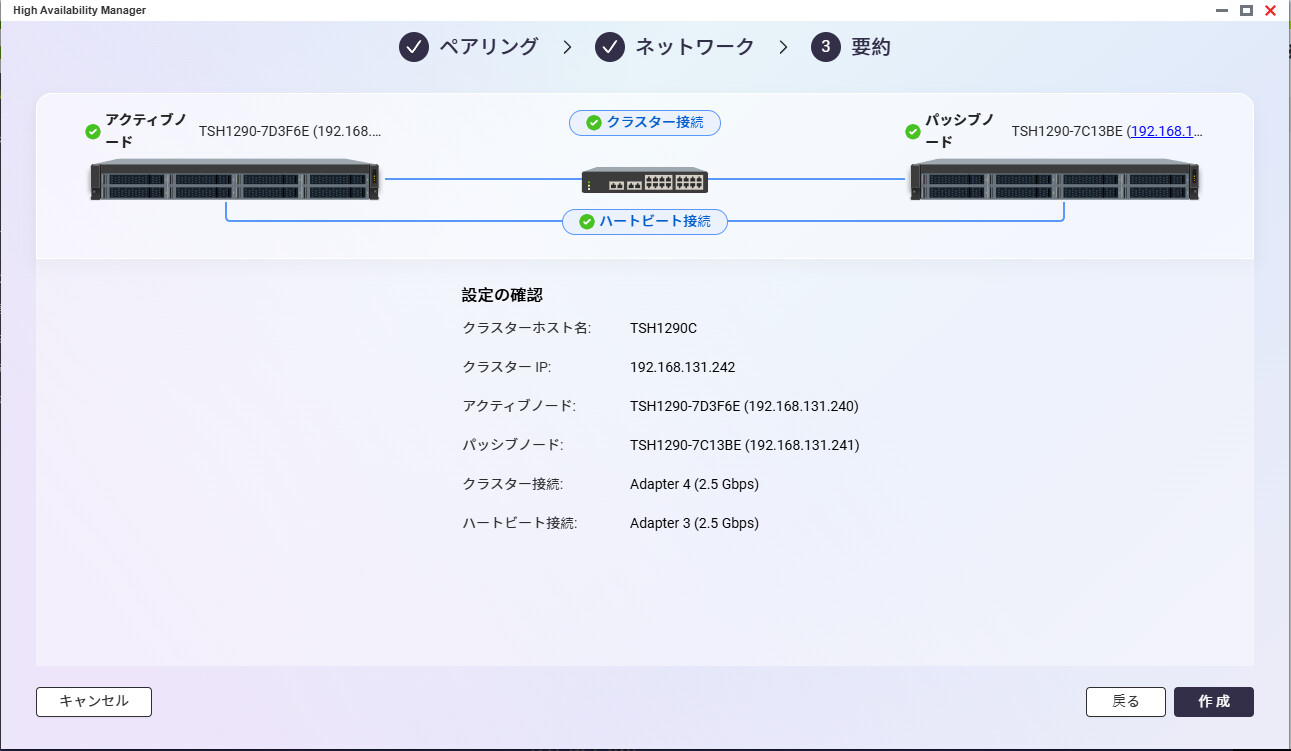
Cluster setup is complete.
Click “Next” to begin cluster initialization.

Cluster creation begins.
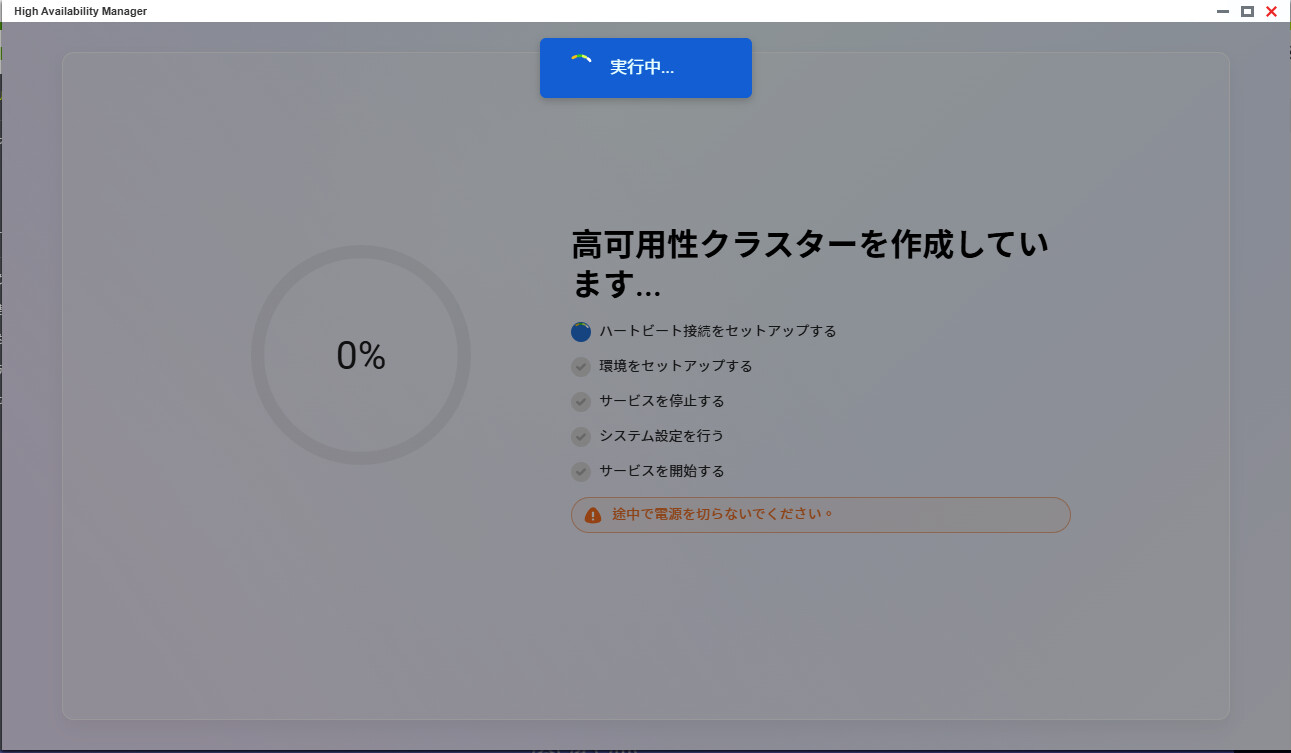
After a short wait, you’ll see a screen like this indicating setup is complete.
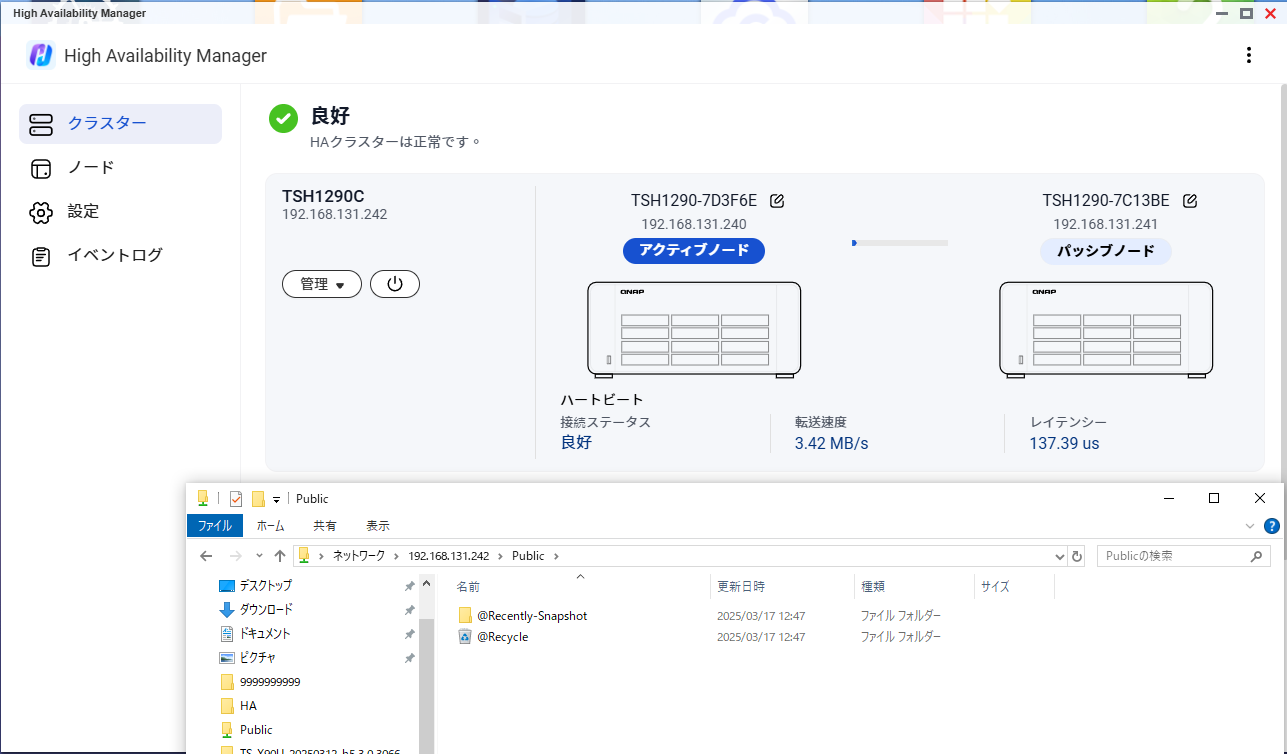
Once the cluster is configured, you can access it via Explorer or similar using the cluster’s IP address.
Checking HA Operation
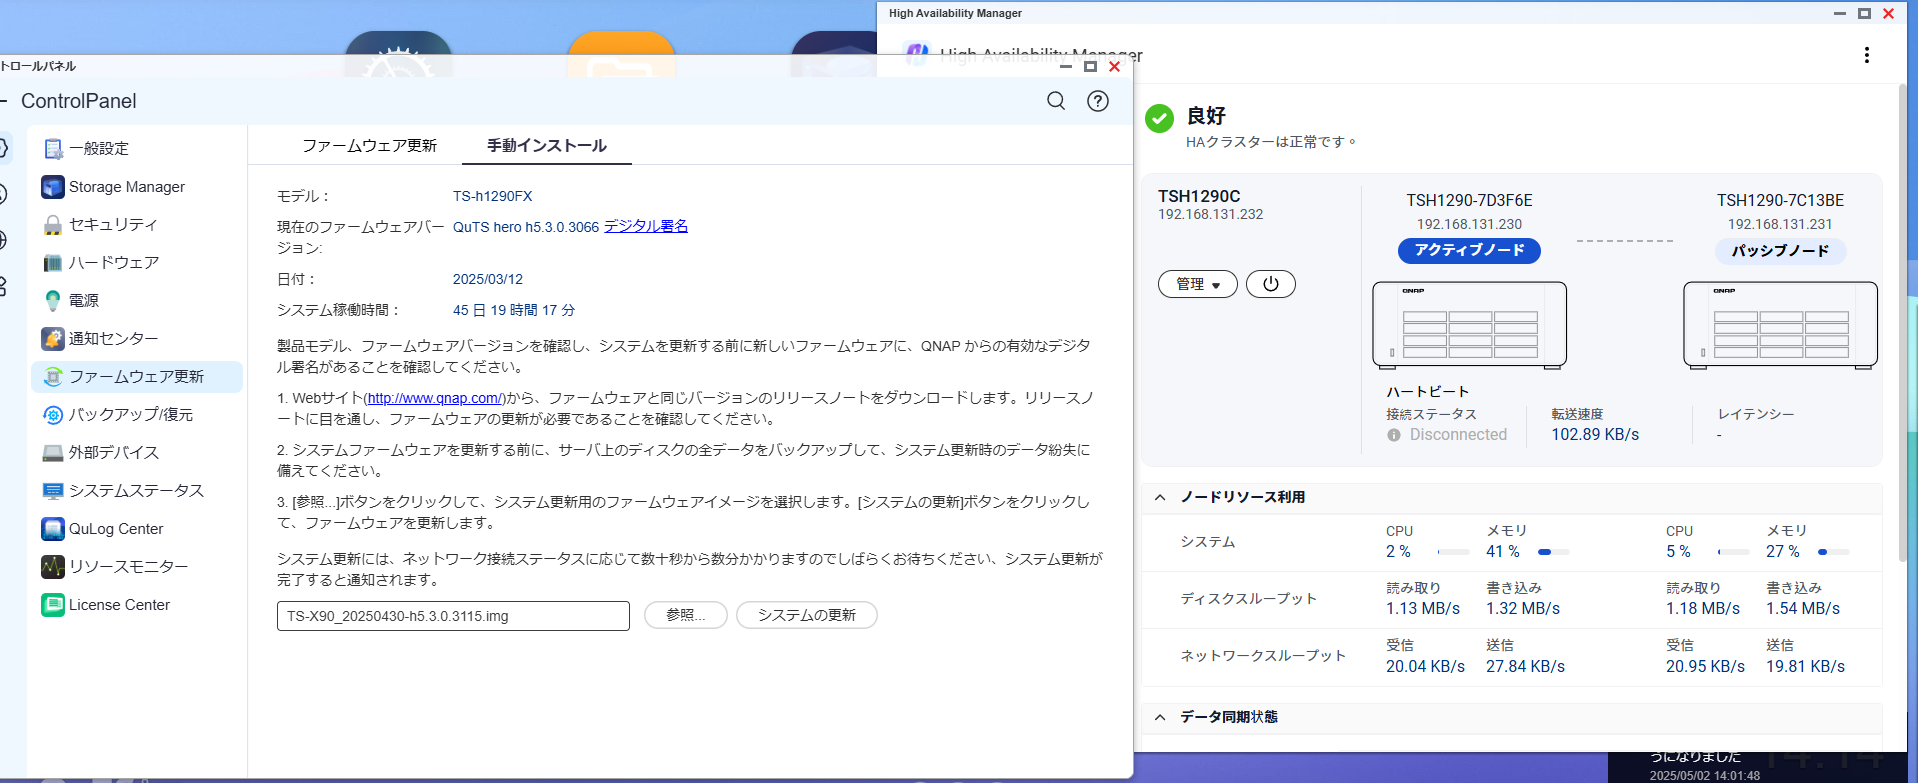
My HA setup was built with a slightly older beta firmware, so it’s a bit behind the latest Public Beta version. First, I’ll apply the latest Public Beta firmware and check how things work.
With the HA configuration in place, I applied the latest firmware.
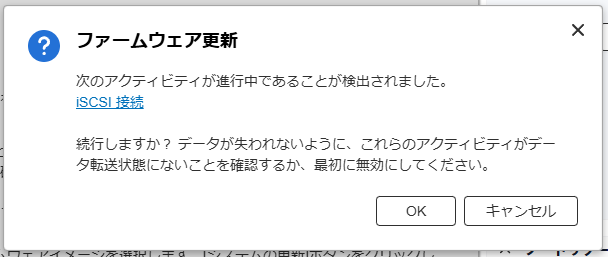
A warning about iSCSI appears.
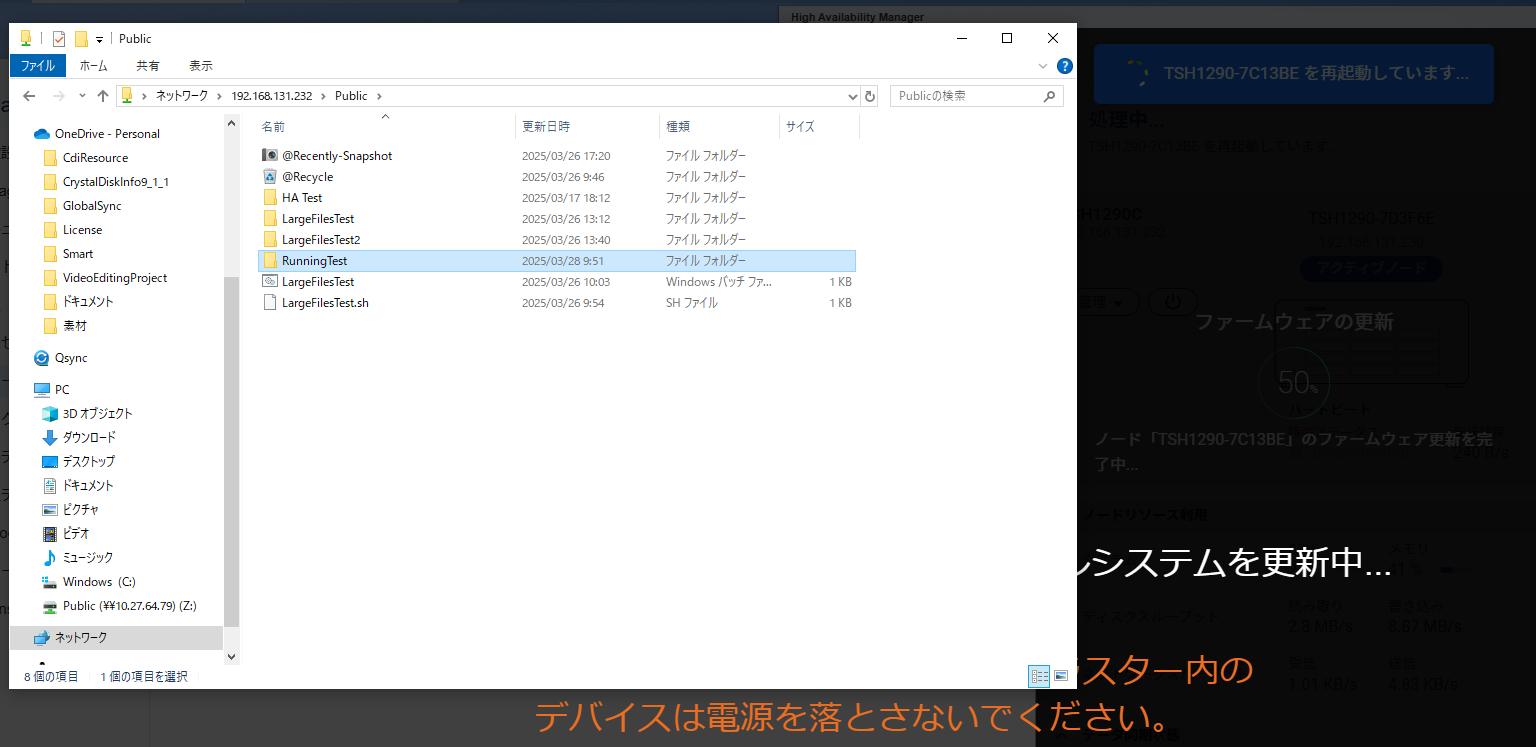
Proceeding, a message appears: “Do not power off during the update.”

While one node is rebooting, I was still able to access via SMB.
After TSH1290-7C13BE finished its firmware update and reboot, the other unit began its kernel update and firmware upgrade.

After a short wait, the firmware update completed successfully.

When I tried a manual switchover, ping dropped temporarily,
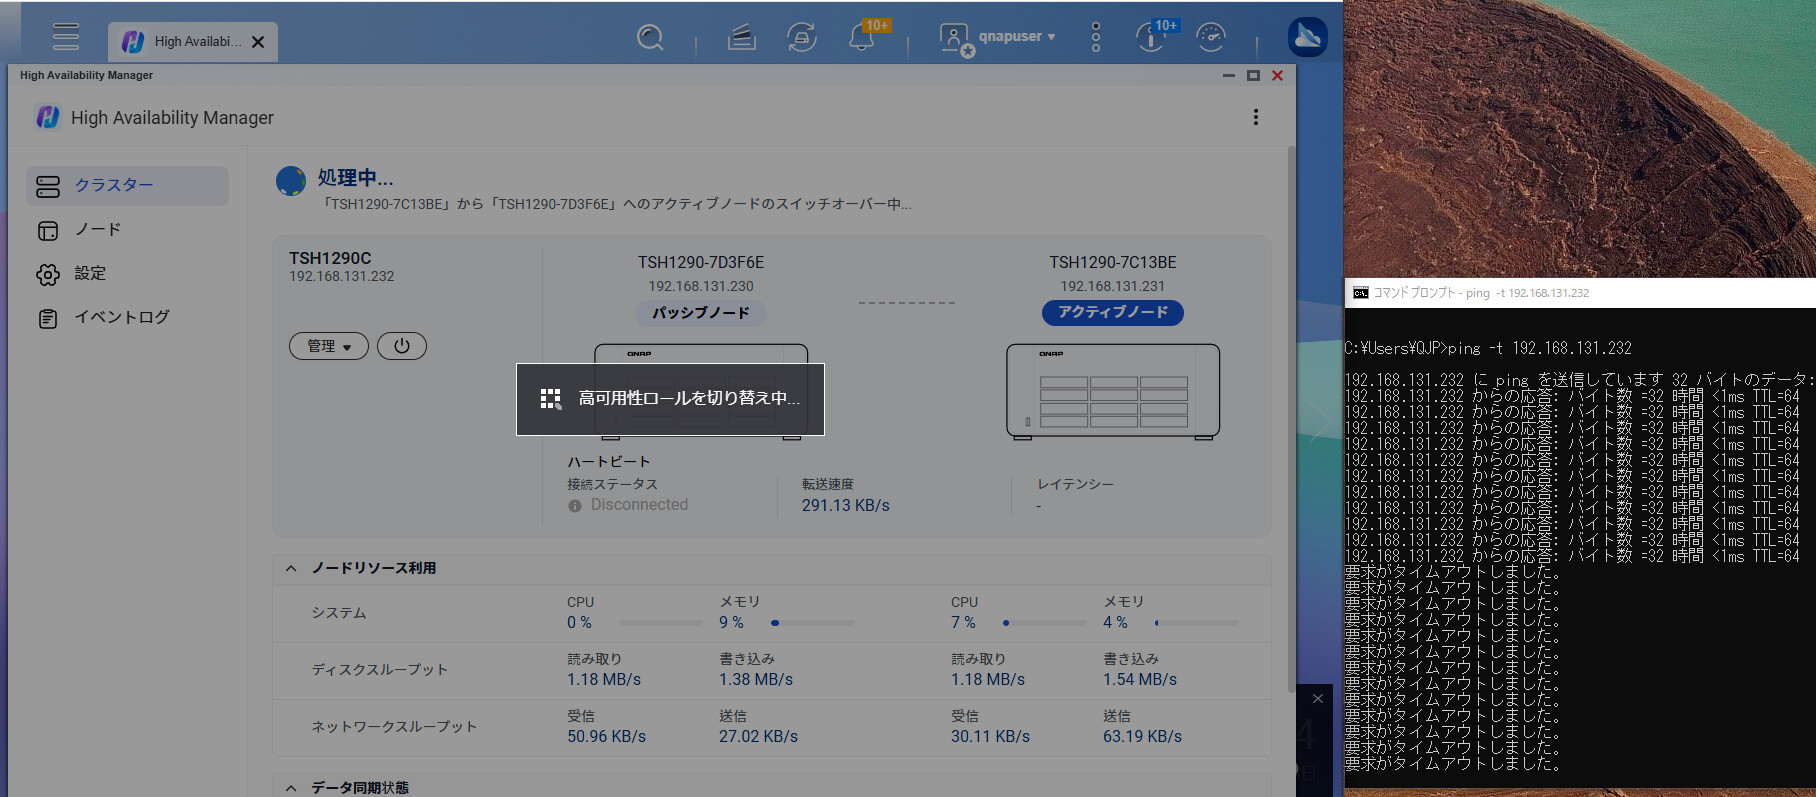
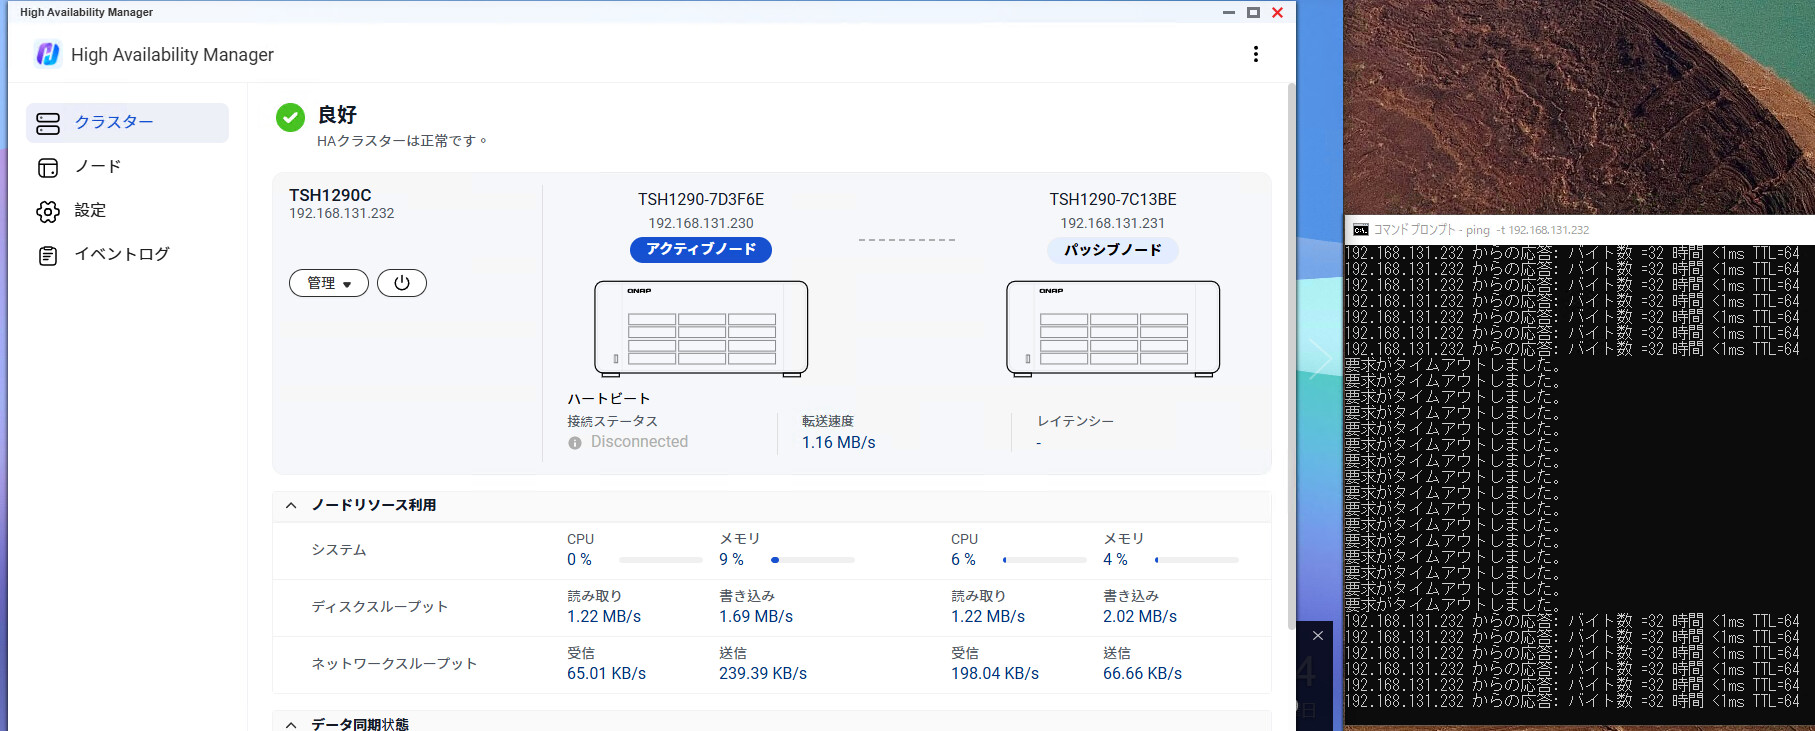
but after the switchover completed, ping responses resumed at the same IP address.
Summary
I tried QNAP’s new two-node HA solution.
The setup steps, required conditions, and behavior during switchover or failover were all straightforward. Although network responses temporarily drop, they quickly recover and you can continue accessing with the same IP.
While data synchronization itself was already possible in real time with SnapSync, handling failures used to require changing IPs and other manual steps. This new HA configuration makes things much cleaner and simpler.
If you’re using two NAS units for mirroring and BCP (Business Continuity Planning), or are considering it, I highly recommend trying out this HA feature.
I haven’t dismantled the environment yet, so if you have any questions or concerns, feel free to ask!